Whether it is hunting season, or you are just looking to go to the shooting range, transporting your guns and accessories can be a real pain unless you have the proper case. What stops most people from investing in a case is the fear that customizing the foam to fit your specific items will take a lot of time and hard work. The truth is, cutting foam for a DIY gun case is pretty simple and not very time-consuming when you have the right tools. Below we discuss what it takes in the simplest terms for your convenience!
What You Will Need:
First, it is important to make sure that you have the items that you need before you get moving on your project. Here is what you will need for your project:
- Hard Gun Case
- Charcoal Foam from Foam Factory, Inc.
- Poster Board (if you don’t want to use your gun to draw your cutouts)
- Sharpie Marker
- Electric Carving Knife or Sharp Serrated blade
DIY Steps:

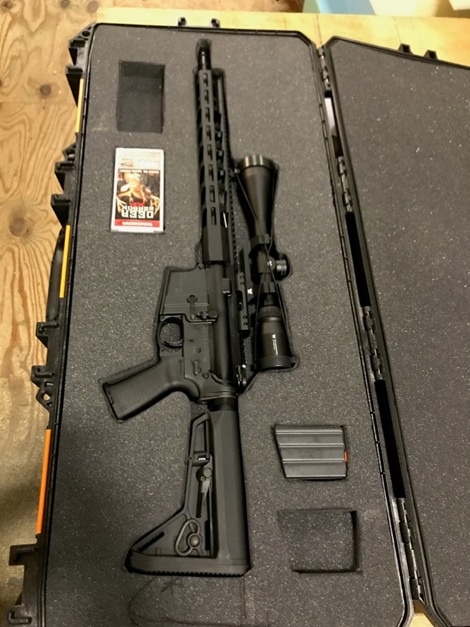
- The first thing that you need to do before making any outlines or cuts is to layout your parts exactly how you want them on the foam. This is crucial, because how you lay these out is exactly how you will cut, so your guns and accessories will sit in the foam exactly as you lay them out. This can be done with the items themselves or with posterboard cut like the parts, if you find that easier.
- Once you have your items or posterboard laid out exactly as you want them cut, it is time to trace the silhouettes of these parts. This is how you will know where you will need to cut the foam. Grab your Sharpie, and begin tracing the parts onto the foam. REMEMBER: Be careful! Any mistakes at this point could be costly, as these can cause you to cut the wrong shape. If you are using posterboard, holding it in place with thumb tacks or pins may help you avoid mistakes.
- Now we come to the most crucial part of your project: cutting the foam! To get the idea of what cutting foam is like with the cutting tool you are using, it is always wise to practice on a different piece of foam that you do not mind scrapping. Once you are comfortable, you can begin cutting into the gun case foam where you have outlined in Sharpie, but do so slowly…in this case, slow and steady wins the race every single time.
- Once the cutting is done, now is the point to make sure everything fits and to clean up your finished product. Using your cutting tool, gently and carefully trim any rough edges, but be careful not to ruin the all-around cut. If there are still visible Sharpie markings, you can gently wipe these off with alcohol until clean. Lastly, and most importantly, insert your gun and accessories to make sure they fit safe and snug in the new cutout. Once everything fits and looks like you want it too, then that’s it!
Alternative Options:
If the DIY Steps above still seem like they may be a little too much to take on, there is yet another option. Although this option is harder to get to your exact specifications, Foam Factory also sells our Charcoal Pick and Pull Grid Foam. This foam comes in a grid of partially cut squares that can picked and pulled out to the shape of your weapon without all the cutting. The foam is automatically perforated into squares, so it may not fit every rounded shape or curve of your weapon, but you can get close and save even more time!
No matter which path you choose to take for your gun case, whether DIY cutting or Pick and Pull, Foam Factory has the foam you need! If you have questions on this project or any other foam project you are working on, Contact Us, and we will be more than happy to assist you!
